
Free Video Footage: The Best Way to Enhance Your Creative Projects
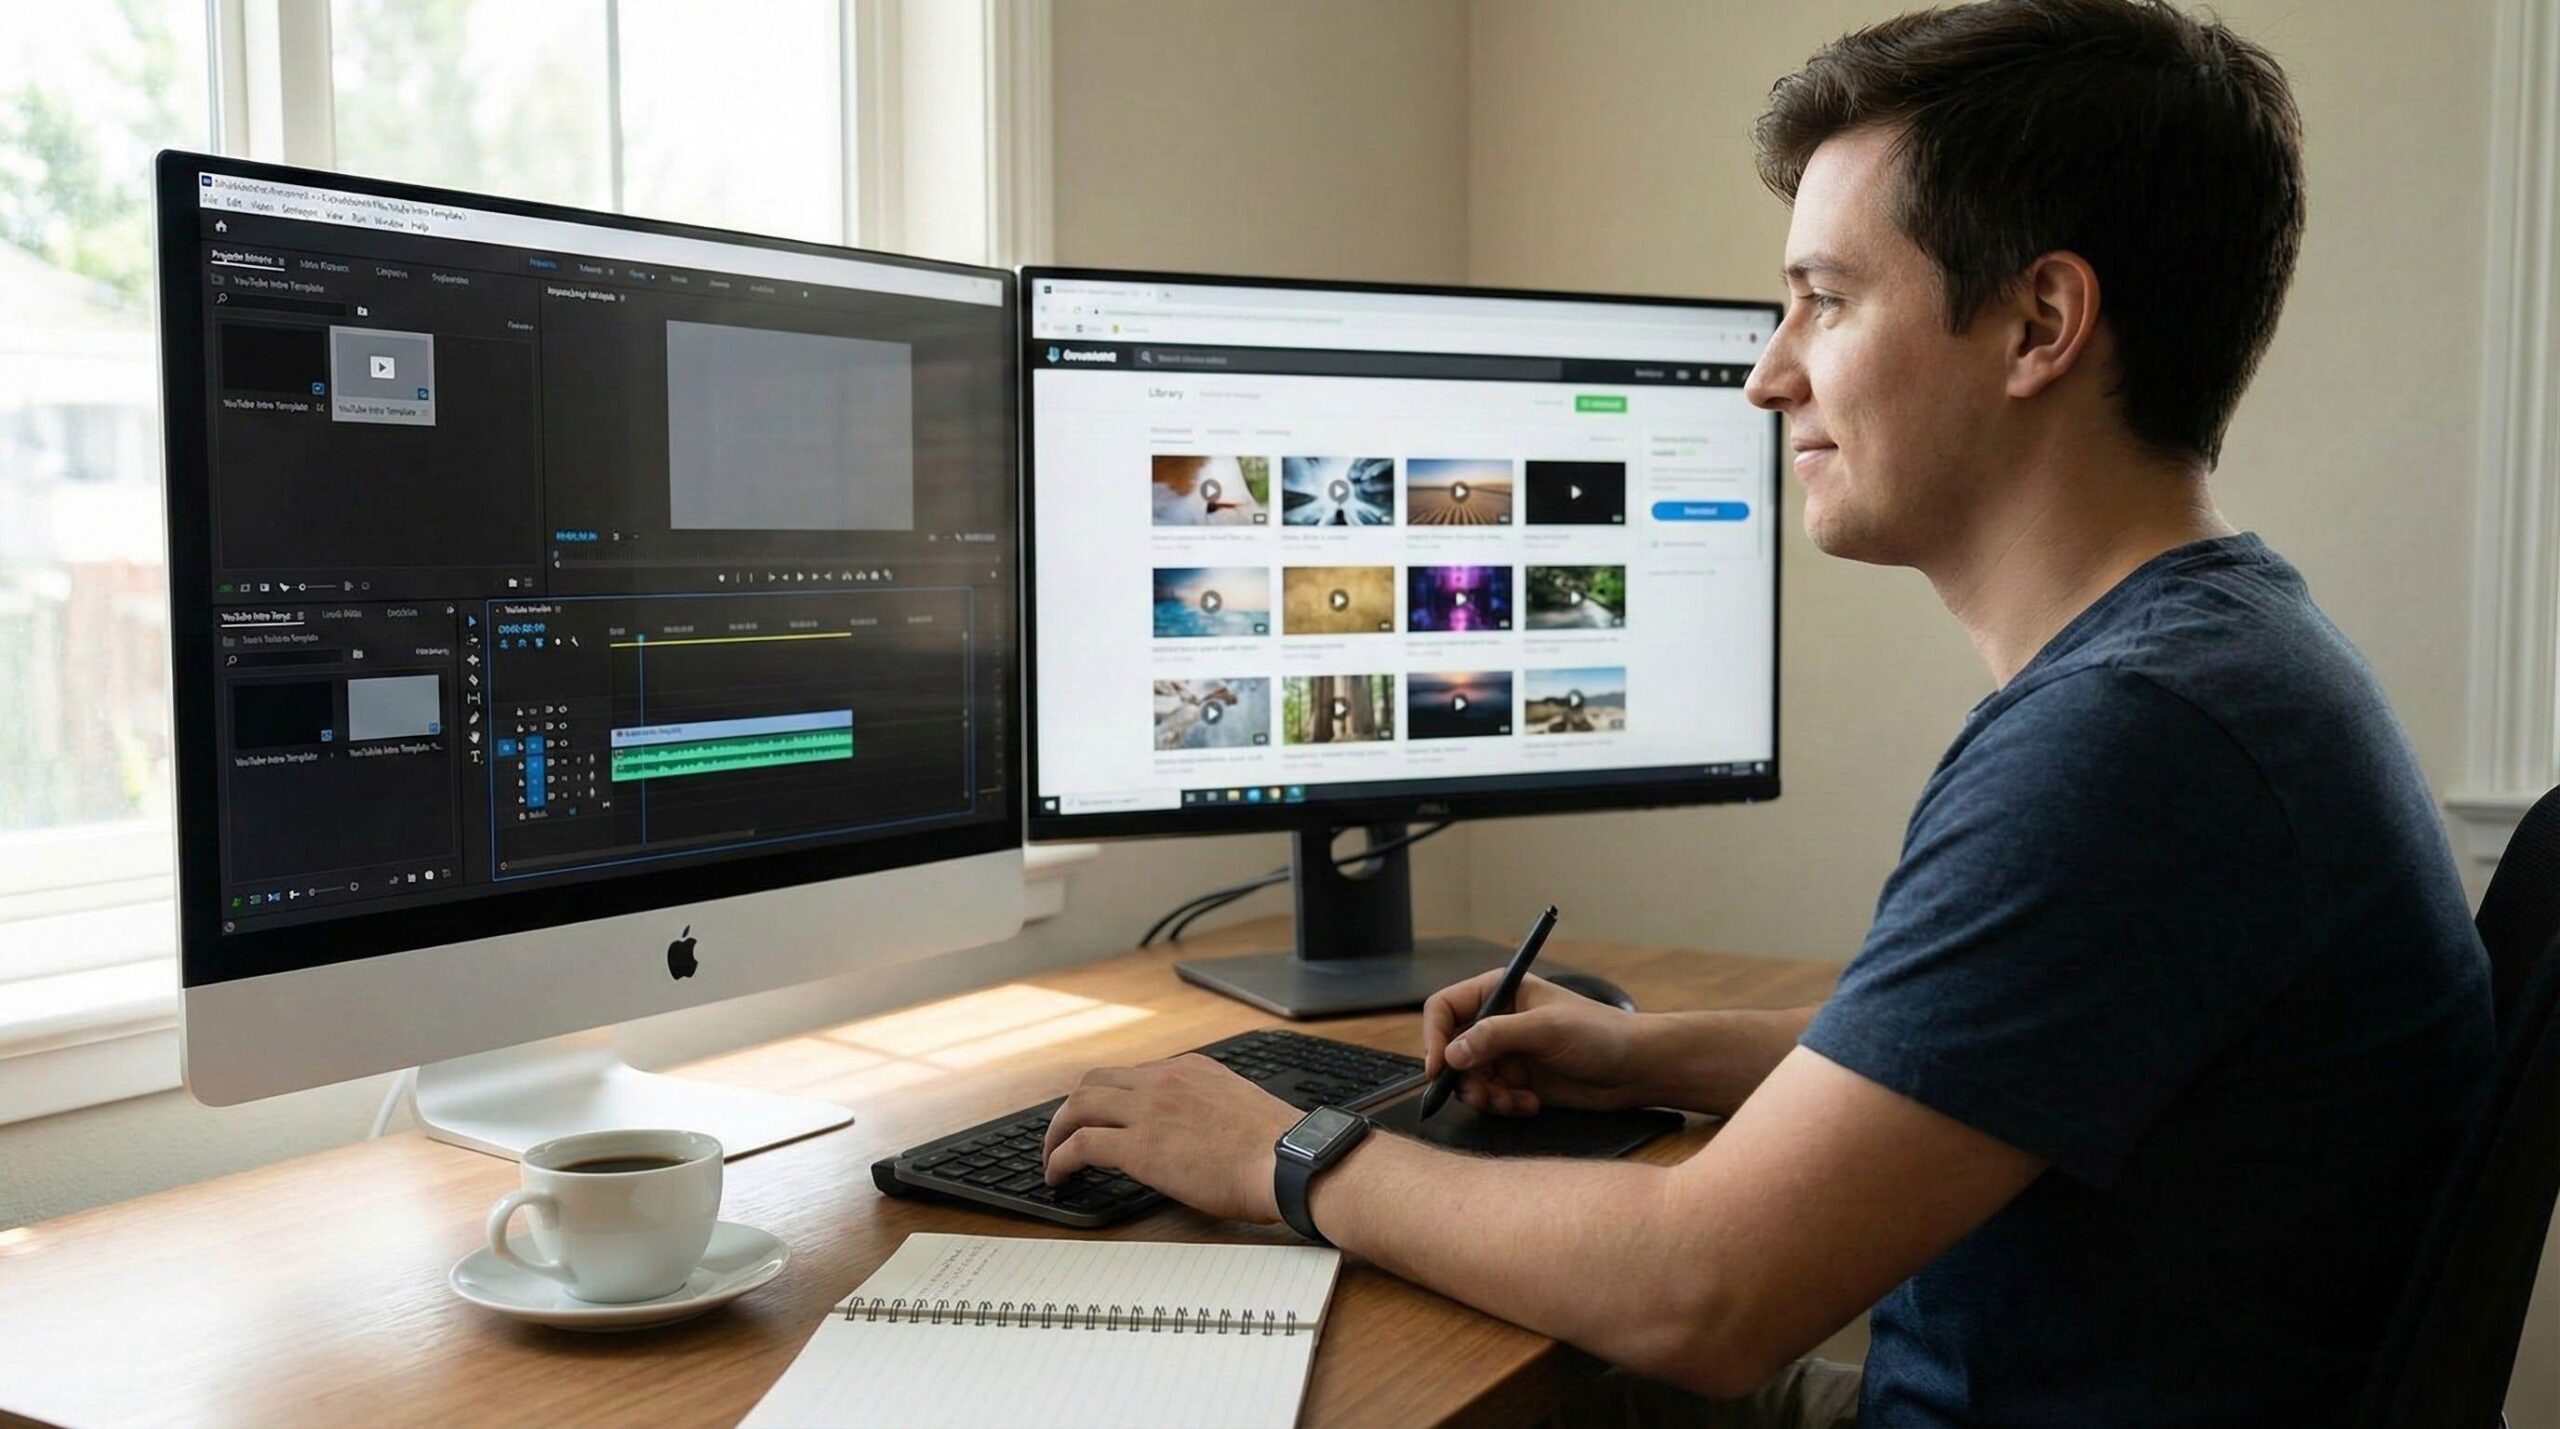
High-quality visuals are essential for creating engaging videos, whether you’re producing content for YouTube, social media, websites, or marketing campaigns. Fortunately, you don’t always need a large budget to create professional-looking videos. Free Video Footage allows creators to access stunning clips without paying expensive licensing fees. From breathtaking landscapes and city skylines to business scenes and lifestyle moments, free stock footage helps bring creative ideas to life while saving both time and money.
Whether you’re a beginner or an experienced filmmaker, using free video clips can significantly improve your content and streamline your production workflow.
What Is Free Video Footage?
Free Video Footage refers to stock video clips that are available at no cost for personal or commercial projects, depending on the licensing agreement. These clips are professionally recorded and cover a wide range of subjects, including nature, technology, business, travel, food, sports, education, and more.
Many stock footage platforms provide videos in HD and even 4K resolution, making them suitable for professional productions. Instead of filming every scene yourself, you can download ready-to-use footage that perfectly complements your project.
Benefits of Using Free Video Footage
There are several reasons why creators choose Free Video Footage for their projects.
Save Production Costs
Hiring videographers, purchasing equipment, and traveling to different locations can be expensive. Free stock footage offers a budget-friendly alternative without sacrificing quality.
Speed Up Content Creation
Finding the right clip takes only a few minutes, allowing editors to complete projects much faster than filming original footage.
Professional Quality
Many free video libraries feature clips captured by experienced filmmakers using professional cameras and equipment. This ensures high-quality visuals that enhance your final production.
Wide Variety of Subjects
Whether you need drone footage, office environments, wildlife, city traffic, or abstract backgrounds, free video libraries offer thousands of options to match nearly every creative need.
Tips for Choosing the Best Free Video Footage
To make the most of Free Video Footage, consider these helpful tips:
- Check the licensing terms before downloading.
- Choose clips that match your video’s color grading and style.
- Download the highest resolution available for greater editing flexibility.
- Use footage that supports your story instead of distracting viewers.
- Organize downloaded clips into folders for easier future access.
These simple practices can improve both your editing efficiency and the overall quality of your videos.
Common Uses for Free Video Footage
Businesses, marketers, educators, and content creators use Free Video Footage in many different ways. Popular applications include YouTube videos, promotional advertisements, corporate presentations, online courses, social media campaigns, website backgrounds, documentaries, podcasts with video, and event highlights. Stock footage also helps fill gaps when original filming is not possible due to time, budget, or location constraints.
Conclusion
Using Free Video Footage is an excellent way to create professional, engaging videos while keeping production costs low. With thousands of high-quality clips available online, creators can easily find visuals that match their projects without the expense of custom filming. By choosing reputable stock footage platforms, understanding licensing requirements, and selecting clips that complement your content, you can produce polished videos that capture your audience’s attention. Whether you’re creating content for business, education, or entertainment, free stock footage is a valuable resource that helps transform ideas into compelling visual stories.
Creating Engaging YouTube Intros with Stock Motion Graphics
In today’s competitive digital landscape, capturing audience attention within the first few seconds of a video is critical. YouTube creators, brands, and content producers rely heavily on strong visual openings to establish identity and retain viewers. One of the most effective ways to achieve this is through stock motion graphics. These ready-made animated assets provide a fast and professional solution for creating eye-catching YouTube intros without the need for advanced animation skills.
The Importance of a Strong YouTube Intro
A YouTube intro serves as the first impression of a video. It sets the tone, communicates branding, and prepares viewers for the content that follows. A well-designed intro can increase viewer retention, reinforce brand recognition, and create a consistent visual identity across a channel.
However, designing custom motion graphics from scratch requires time, expertise, and specialized software. For many creators, especially beginners or small teams, this process can be overwhelming. Stock motion graphics offer an accessible alternative.
What Are Stock Motion Graphics?
Stock motion graphics are pre-designed animated elements that can be easily customized and integrated into video projects. These may include logo animations, title sequences, lower thirds, transitions, and background animations.
Available in formats compatible with popular editing software like Adobe After Effects, Premiere Pro, and Final Cut Pro, these assets allow creators to produce polished intros quickly. Many templates come with editable text, colors, and placeholders, making it easy to align them with a brand’s identity.
In addition to premium resources, some platforms also offer Free Video Footage and motion graphics, providing budget-friendly options for creators at all levels.
Benefits of Using Stock Motion Graphics for Intros
One of the biggest advantages of stock motion graphics is efficiency. Instead of spending hours designing animations, creators can simply download a template and customize it within minutes.
These assets are often created by professional designers, ensuring high-quality visuals that enhance the overall production value of a video. This is particularly important for YouTube, where visual quality can influence viewer perception and engagement.
Stock motion graphics also provide flexibility. With a wide variety of styles available—from minimalist and modern to bold and cinematic—creators can choose designs that match their content niche and audience preferences.
Customization and Branding
While stock motion graphics are pre-made, they are highly customizable. Creators can adjust colors, fonts, logos, and text to reflect their unique branding. This ensures that even though the base template is shared, the final output feels original and tailored.
Consistency is key in building a recognizable YouTube channel. Using the same intro style across multiple videos helps establish a cohesive brand identity that viewers can easily recognize.
Combining motion graphics with sound effects or music further enhances the intro, making it more memorable and engaging.
Best Practices for YouTube Intros
When using stock motion graphics, it is important to keep intros concise. Most successful YouTube intros are between 3 to 7 seconds long. Longer intros risk losing viewer attention, especially in fast-paced content environments.
Clarity is also essential. The intro should clearly present the channel name or logo without overwhelming the viewer with too many elements. Clean, simple designs often perform better than overly complex animations.
Additionally, creators should ensure that the style of the intro aligns with the content of the video. For example, a tech channel may benefit from sleek, modern animations, while a travel vlog might use vibrant and dynamic visuals.
Final Thoughts
Stock motion graphics have become an essential tool for YouTube creators looking to produce professional intros quickly and efficiently. They offer a balance between quality, convenience, and customization, making them suitable for creators at all levels.
By leveraging high-quality templates and resources such as Free Video Footage, content creators can enhance their video openings, strengthen their brand identity, and capture audience attention from the very first second.
How to Edit GoPro Videos Like a Pro: Ultimate Guide for Stunning Action Footage
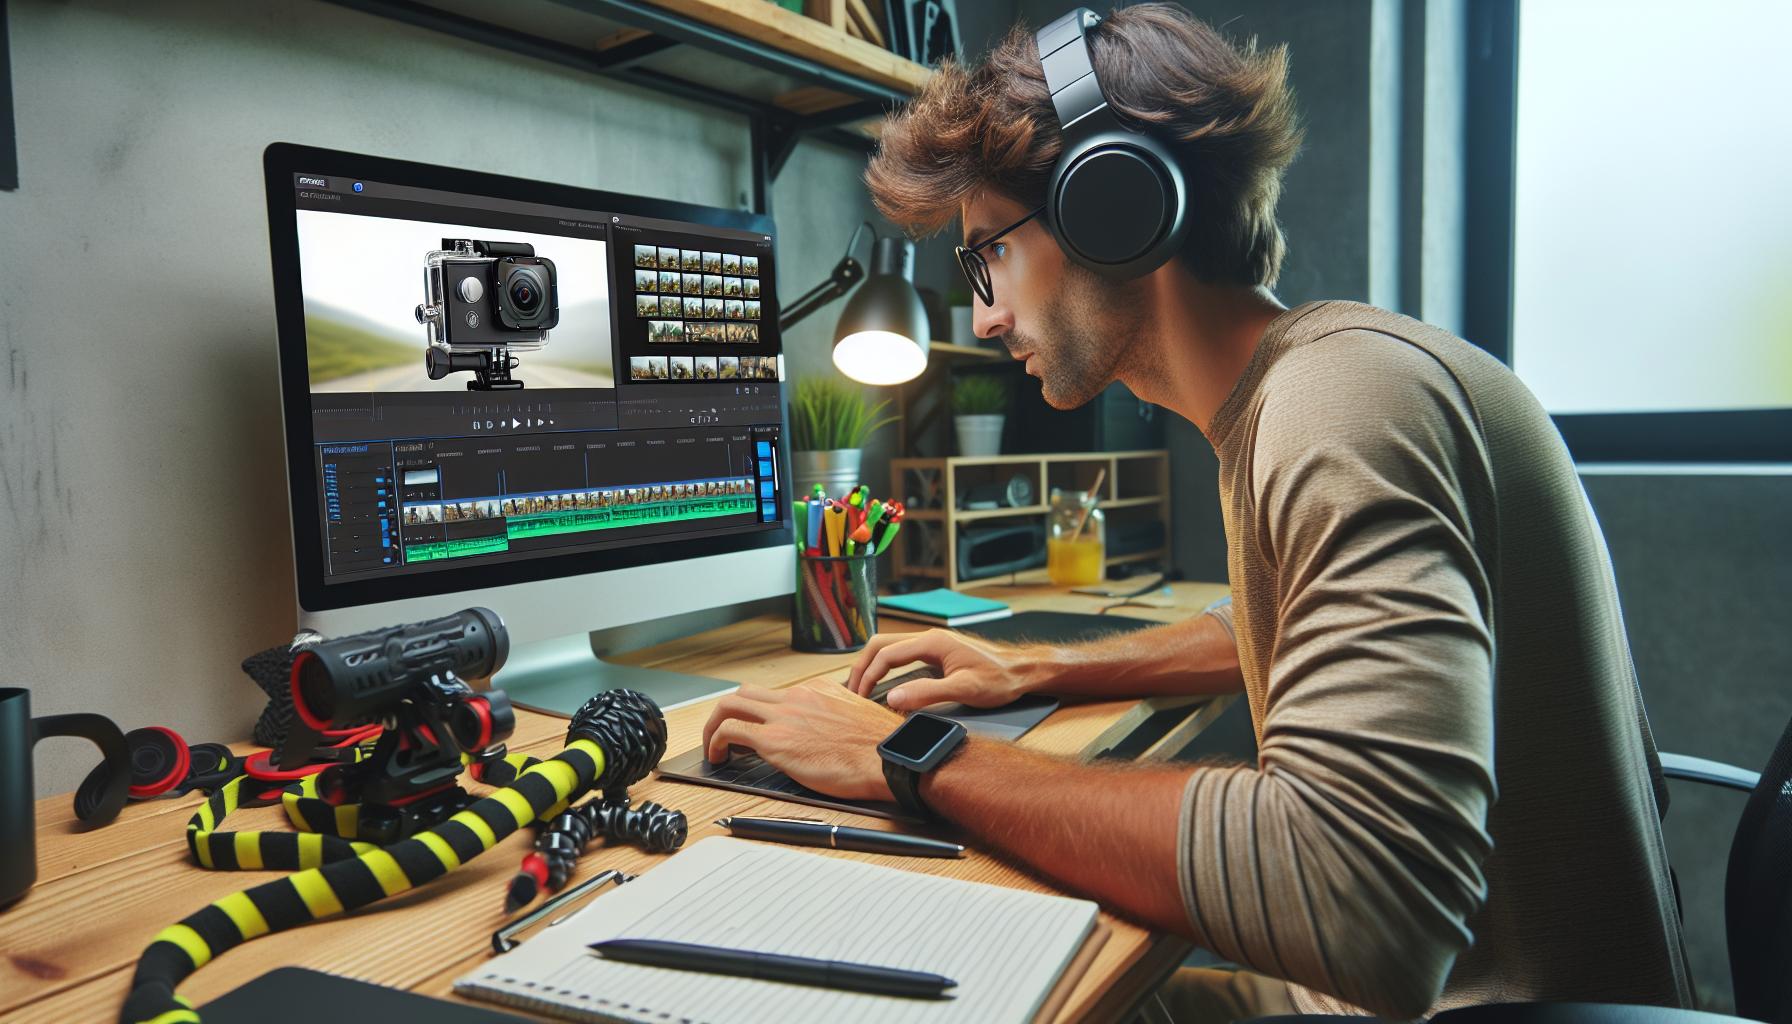
I’ve spent countless hours editing GoPro footage from my outdoor adventures and I know firsthand how overwhelming it can be to turn raw clips into captivating videos. Whether you’re capturing epic ski runs down snowy slopes or immersive underwater scenes while diving GoPro footage requires specific editing techniques to truly shine.
As an action camera enthusiast I’ll walk you through the essential steps to transform your shaky footage into professional-looking content that’ll wow your viewers. From choosing the right editing software to applying stabilization tricks and color correction I’ve learned what works best for GoPro’s unique wide-angle footage. With the right approach you’ll be able to create stunning videos that capture all the excitement of your adventures without the common pitfalls that plague many action camera clips.
Essential GoPro Video Editing Tools and Software
I’ve tested numerous editing solutions for GoPro footage over the years, identifying the most effective tools for both desktop and mobile platforms. These applications offer specific features optimized for action camera content, ensuring smooth editing workflows.
Best Desktop Editing Applications
Professional GoPro video editing demands robust desktop software with advanced capabilities. Here are the top desktop applications I trust for editing GoPro content:
-
Adobe Premiere Pro
- Native GoPro codec support
- Advanced stabilization features
- Professional color grading tools
- Multiple timeline editing
-
DaVinci Resolve
- Free version available
- Industry-standard color correction
- Built-in motion tracking
- High-performance rendering
-
GoPro Quik Desktop
- Direct camera file import
- Automated highlight detection
- Template-based editing
- Quick export options
Mobile Apps for Quick Edits
Mobile editing apps provide immediate post-capture adjustments for GoPro footage. These are my preferred mobile solutions:
-
GoPro Quik Mobile
- Wireless footage transfer
- Auto-generated video stories
- Basic trimming tools
- Built-in music library
-
LumaFusion
- Multi-track timeline
- Professional transitions
- Advanced export settings
- Custom preset options
- Simple interface
- Quick clip assembly
- Social media optimization
| Software Type | Processing Speed | Free Version | Pro Features |
|---|---|---|---|
| Desktop Apps | High | Limited | 100+ |
| Mobile Apps | Moderate | Basic | 25-50 |
Preparing Your GoPro Footage for Editing
Before diving into the editing process, I organize my GoPro footage systematically to create an efficient workflow. This preparation phase ensures smooth editing and helps maintain project organization throughout the process.
File Organization and Storage
I create a dedicated folder structure with specific naming conventions for each GoPro project:
- Main Project Folder: YYYYMMDD_ProjectName
- Raw Footage: /Raw
- Edited Clips: /Edited
- Final Exports: /Export
- Project Files: /Project
- Media Assets: /Assets
For storage optimization, I maintain two backups:
- External SSD for active projects
- Cloud storage for archived footage
Importing and Converting Video Files
I convert GoPro footage to editing-friendly formats using these specifications:
| Format Type | Codec | Resolution | Frame Rate |
|---|---|---|---|
| Working Files | ProRes 422 | Original | Original |
| Proxy Files | H.264 | 1080p | Original |
| Final Export | H.265 | 4K | 30/60fps |
- Transferring files from SD card to main storage
- Creating proxy files for smoother editing
- Organizing clips by shooting date or sequence
- Renaming files with descriptive titles
- Checking metadata for camera settings
Basic GoPro Editing Techniques

I’ve mastered several fundamental techniques for editing GoPro videos that transform raw footage into engaging content. These essential methods focus on creating smooth transitions, enhancing visual quality, and maintaining viewer interest throughout the video.
Trimming and Combining Clips
My first step in editing GoPro videos involves removing unnecessary footage and combining the best segments. I select dynamic moments that capture peak action, trim out shaky transitions between shots, and arrange clips in a sequence that tells a cohesive story. Here’s my proven approach:
- Cut the first 3-5 seconds where the camera settles after pressing record
- Remove blurry or unstable sections between primary actions
- Create seamless transitions using J-cuts or L-cuts between clips
- Link similar movements across different shots for fluid motion
- Keep action sequences under 15 seconds to maintain engagement
Color Correction and Stabilization
GoPro footage requires specific adjustments to achieve professional-quality results. I apply precise color correction techniques and stabilization to enhance the visual appeal:
- Adjust exposure levels to balance bright outdoor scenes
- Fine-tune contrast settings to enhance depth in flat footage
- Apply color temperature corrections to match clips from different times
- Enable ReelSteady or HyperSmooth stabilization for smooth motion
- Add lens distortion correction to remove fisheye effects
| Setting | Adjustment Range |
|---|---|
| Exposure | +/- 1.5 stops |
| Contrast | 10-20% increase |
| Saturation | 5-15% boost |
| Sharpness | 10-25% enhancement |
| Stabilization | 15-30% strength |
Adding Professional Effects

Professional effects elevate GoPro videos from basic recordings to cinematic productions. I’ve mastered several techniques to enhance my action camera footage through strategic use of transitions speed controls text elements.
Transitions and Speed Adjustments
I apply dynamic transitions like cross dissolves wipes zoom transitions to create smooth flow between clips. For action sequences I implement speed ramping – accelerating through mundane moments then slowing down to 50% speed during key highlights. Here’s how I optimize speed effects:
- Set keyframes at precise moments to create smooth speed variations
- Use speed ramping during POV shots to emphasize dramatic moments
- Apply time warps for creative transitions between scenes
- Implement freeze frames for 2-3 seconds to highlight epic moments
Text Overlays and Graphics
- Lower thirds to display location names dates descriptions
- Animated titles using preset templates or custom animations
- Social media handles watermarks for branding
- Data overlays showing speed altitude GPS coordinates
- Motion tracking text that follows moving subjects
| Effect Type | Recommended Duration | Best Use Case |
|---|---|---|
| Speed Ramps | 2-4 seconds | Action sequences |
| Text Overlays | 3-5 seconds | Location/info display |
| Transitions | 0.5-1 second | Scene changes |
| Motion Graphics | 2-3 seconds | Intro/outro segments |
Advanced GoPro Editing Tips

I leverage advanced editing techniques to transform raw GoPro footage into professional-quality content that captures viewers’ attention. These advanced methods elevate standard action camera videos into cinematic experiences.
Multi-Camera Editing
I synchronize multiple GoPro cameras using visual cues or audio waveforms to create dynamic perspectives. When editing footage from 2-3 mounted GoPros, I align clips by matching distinct moments like a hand clap or sudden movement. For seamless transitions between angles, I use:
- Match cuts based on motion direction
- Split-screen effects showing simultaneous action
- Picture-in-picture overlays for detailed views
- Cross-dissolves timed to music beats
- Quick cuts between angles during high-energy sequences
Sound Design and Music
I enhance GoPro videos by creating layered soundscapes that complement the visual elements. My audio workflow includes:
- Isolating usable natural sounds from GoPro’s built-in mic
- Adding ambient sound effects for environment authenticity
- Incorporating foley effects for impact moments
- Mixing background music at -12db to -15db
- Using audio transitions like crossfades
- Syncing sound effects with visual cuts
| Layer | Content | Volume Range |
|---|---|---|
| Top | Key sound effects | -6db to -3db |
| Middle | Voice/natural audio | -9db to -6db |
| Bottom | Background music | -15db to -12db |
Exporting and Sharing Your GoPro Videos
After completing the editing process, I optimize my GoPro videos for different platforms using specific export settings to maintain quality while managing file sizes effectively.
Optimal Export Settings
I export my GoPro videos using these proven settings for optimal quality:
- Resolution: 4K (3840×2160) for highest quality or 1080p (1920×1080) for web sharing
- Frame Rate: Match original footage (30fps/60fps) to maintain smooth motion
- Codec: H.264 for wide compatibility or H.265 for smaller file sizes
- Bitrate: 60Mbps for 4K or 20Mbps for 1080p content
- Audio: AAC format at 320kbps for clear sound
- Color Space: Rec.709 for standard viewing devices
- File Format: MP4 for maximum platform compatibility
Publishing Platforms
I distribute my edited GoPro content across these platforms:
Social Media
- Instagram: 60-second vertical clips (1080×1920)
- YouTube: Full-length videos in 4K resolution
- TikTok: 15-60 second vertical clips (1080×1920)
- Facebook: Compressed 1080p for better loading times
- Google Drive: Original quality exports for clients
- Vimeo: High-bitrate 4K for portfolio showcase
- WeTransfer: Large file transfers to collaborators
- Dropbox: Project file backups with sharing capabilities
| Platform | Max Resolution | Max Duration | Recommended Bitrate |
|---|---|---|---|
| YouTube | 4K | Unlimited | 45-60 Mbps |
| 1080p | 60 seconds | 15-20 Mbps | |
| TikTok | 1080p | 3 minutes | 15-20 Mbps |
| 1080p | 240 minutes | 20-30 Mbps |
Conclusion
Creating captivating GoPro videos requires more than just capturing great footage. I’ve found that successful editing combines technical expertise organization and creative vision. With the right tools and techniques I’ve shared you’ll be well-equipped to transform your raw footage into stunning visual stories.
Whether you’re using professional software or mobile apps the key is to maintain a consistent workflow and pay attention to details. Remember that practice makes perfect and each video you edit will help you develop your unique style.
Don’t be afraid to experiment with different effects transitions and storytelling techniques. Your GoPro footage holds endless creative possibilities – it’s time to bring them to life through thoughtful editing.
How Music Videos Revolutionized the Entertainment Industry: From MTV to YouTube

Music videos have revolutionized how we experience and consume music since MTV first aired in 1981. These visual masterpieces blend artistry cinematography and storytelling to create an immersive experience that enhances our connection with songs and artists.
We’ve witnessed the evolution of music videos from simple performance recordings to elaborate mini-films with multi-million dollar budgets. Today’s music videos serve as powerful marketing tools helping artists reach global audiences while pushing creative boundaries. The rise of platforms like YouTube and Vevo has transformed music videos into essential components of an artist’s brand identity and digital presence.
What Is a Music Video
A music video is an artistic audiovisual production that combines recorded music with synchronized visuals to enhance the song’s impact. These short films serve as promotional tools for musicians while providing viewers with a visual interpretation of the musical content.
Key Elements of Music Videos
Music videos incorporate five essential components that work together to create a compelling visual experience:
- Narrative Structure: Tells a cohesive story through sequential scenes or abstract concepts
- Performance Footage: Features artists singing or playing instruments in staged settings
- Visual Effects: Incorporates digital animations graphics transitions color grading
- Cinematography: Uses camera angles lighting techniques shot composition
- Choreography: Integrates dance sequences synchronized movements artistic expressions
Brief History of Music Videos
The evolution of music videos spans multiple decades marked by significant technological advancements:
| Decade | Key Development | Impact |
|---|---|---|
| 1940s | Soundies | First commercial music visualization |
| 1981 | MTV Launch | Global music video distribution |
| 2005 | YouTube Launch | Digital democratization |
| 2009 | Vevo Launch | Premium music content platform |
The Evolution of Music Video Production
Music video production techniques transformed from simple camera setups to sophisticated digital workflows. The advancement in technology revolutionized both the creative process and the final output quality of music videos.
Traditional Production Methods
Early music video production relied on film-based cameras and practical effects. Directors used multiple film reels to capture performances from various angles with basic lighting setups. Post-production involved manual film cutting and splicing techniques in editing rooms. The 1980s introduced innovations like chromakey effects and motion control cameras, enabling more complex visual storytelling through:
- Physical set construction for elaborate performance spaces
- Analog special effects using mirrors, smoke machines and lighting tricks
- Multiple camera configurations to capture synchronized performances
- Frame-by-frame animation for creative transitions
- Optical printing for layered visual effects
Modern Digital Techniques
Digital technology revolutionized music video production through powerful computer-based tools and workflows. Modern productions integrate:
- CGI animations and 3D modeling software for virtual environments
- Motion tracking systems for dynamic camera movements
- Digital compositing platforms for seamless visual effects
- High-resolution digital cameras with advanced color grading
- Cloud-based collaboration tools for remote production teams
| Resource Type | Usage in Music Videos |
|---|---|
| Stock Footage | Background elements and transitions |
| Visual Effects | Digital overlays and atmospherics |
| Music Stems | Additional audio elements |
| Motion Graphics | Animated text and graphics |
Impact of Music Videos on Popular Culture
Music videos transformed the entertainment landscape by merging visual storytelling with musical expression. This revolutionary format reshaped how audiences consume music across different media platforms.
Cultural Influence and Trends
Music videos establish cultural touchstones through innovative visuals techniques. Michael Jackson’s “Thriller” sparked a global dance phenomenon in 1983 while Madonna’s “Vogue” introduced ballroom culture to mainstream audiences in 1990. Social media platforms amplify these cultural impacts by enabling viral dance challenges inspired by music videos like Drake’s “In My Feelings” which generated over 795 million user-created videos.
| Impact Metric | Statistics |
|---|---|
| Average music video views | 1.8B (Top 100) |
| Cultural dance trends | 250M+ participants |
| Fashion influence revenue | $2.1B annually |
Marketing and Commercial Success
Music videos serve as powerful marketing tools that drive commercial success across multiple revenue streams. Artists leverage visual content through strategic placement on platforms like YouTube Premium Music generating an average of $2,000 per million views. Stock footage companies including Adobe Stock Images provide cost-effective visual elements for music video production enabling creators to enhance production value while managing budgets.
| Revenue Source | Average Return |
|---|---|
| YouTube monetization | $2K/million views |
| Merchandise sales | 35% increase post-release |
| Streaming boost | 85% higher first-week plays |
Stock footage integration from providers like Shutterstock Free Images allows independent artists to create professional-quality videos at reduced costs. These resources democratize music video production by offering affordable alternatives to custom shooting while maintaining visual standards that resonate with audiences.
Famous Music Video Directors and Their Styles
Music video directors shape the visual landscape of popular music through distinctive artistic approaches and innovative techniques. Their unique styles have created iconic moments in music video history.
Iconic Music Video Aesthetics
Spike Jonze
- Creates quirky narratives with unconventional camera movements
- Incorporates surreal elements in everyday settings
- Notable works: Beastie Boys’ “Sabotage” Fatboy Slim’s “Weapon of Choice”
Michel Gondry
- Specializes in practical effects over digital manipulation
- Designs complex single-take sequences
- Notable works: White Stripes’ “Fell in Love with a Girl” Björk’s “Army of Me”
Hype Williams
- Pioneered the fisheye lens aesthetic in hip-hop videos
- Uses high-contrast lighting with bold color palettes
- Notable works: Missy Elliott’s “The Rain” Busta Rhymes’ “Put Your Hands Where My Eyes Could See”
Dave Meyers
- Integrates cutting-edge visual effects with storytelling
- Creates large-scale production numbers with intricate set designs
- Notable works: Kendrick Lamar’s “HUMBLE.” Ariana Grande’s “No Tears Left to Cry”
Jonas Åkerlund
- Employs rapid-fire editing techniques
- Combines fashion photography with cinematic elements
- Notable works: Madonna’s “Ray of Light” Lady Gaga’s “Paparazzi”
- Focuses on minimalist compositions
- Utilizes stark lighting contrasts
- Notable works: Johnny Cash’s “Hurt” Nine Inch Nails’ “Closer”
Each director’s signature style has influenced countless music videos produced by emerging creators who now have access to professional resources through stock footage platforms for creating high-quality visuals on modest budgets.
| Director | Average Video Budget | Typical Production Time |
|---|---|---|
| Spike Jonze | $500,000 | 4-6 weeks |
| Hype Williams | $750,000 | 3-5 weeks |
| Dave Meyers | $1,000,000 | 6-8 weeks |
| Michel Gondry | $400,000 | 5-7 weeks |
Distribution and Streaming Platforms
Music video distribution has evolved from traditional television broadcasts to diverse digital platforms, creating multiple channels for artists to share their content with global audiences.
From MTV to YouTube
MTV revolutionized music video distribution in 1981 by creating a 24-hour television channel dedicated to music videos. The platform’s dominance lasted through the 1990s until the digital revolution transformed distribution methods. YouTube’s launch in 2005 democratized music video sharing, enabling artists to upload content directly to audiences without traditional gatekeepers.
Key distribution milestones:
- 1981: MTV launch establishes dedicated music video channel
- 2005: YouTube creates open platform for video sharing
- 2009: Vevo launches as premium music content destination
- 2015: YouTube Music introduces specialized streaming service
Modern Streaming Platforms
Current music video distribution spans multiple platforms:
Primary Platforms:
- YouTube (2.6 billion monthly active users)
- Vevo (150+ million daily views)
- Apple Music (integrates music videos with streaming)
- Tidal (offers high-definition music video streaming)
- Instagram Reels (short-form music video sharing)
Platform Features Comparison:
| Platform | Video Quality | Monetization | Artist Control |
|---|---|---|---|
| YouTube | Up to 8K | Ad revenue sharing | Full upload rights |
| Vevo | Up to 4K | Premium ad rates | Curated content |
| Apple Music | Up to 4K | Subscription based | Label managed |
| Tidal | Up to 1080p | Subscription based | Artist focused |
Revenue Models
Digital platforms generate revenue through:
- Advertisement placement
- Premium subscriptions
- Pay-per-view content
- Licensing agreements
- Brand partnerships
| Revenue Source | Average Earnings |
|---|---|
| YouTube CPM | $3-10 per 1000 views |
| Vevo Premium Ads | $25-35 per 1000 views |
| Platform Subscriptions | $0.003-0.005 per stream |
The Future of Music Videos
Music videos continue to evolve with technological advancements creating immersive experiences that transform how audiences interact with music. Digital innovations reshape the landscape of music video production enabling creators to push creative boundaries.
Interactive and Virtual Reality Experiences
Virtual reality transforms traditional music videos into immersive 360-degree experiences where viewers actively participate in the narrative. Artists integrate interactive elements like clickable hotspots voice commands gesture controls into their videos enabling real-time viewer engagement. VR music videos incorporate volumetric capture technology creating three-dimensional performances viewers explore from multiple angles.
Advanced VR applications include:
- Motion-tracked dance tutorials syncing viewer movements with artists
- Virtual concert spaces where fans interact with 3D environments
- Branching narratives allowing viewers to choose different story paths
- Multi-user social experiences connecting fans globally
| VR Music Video Statistics | Data |
|---|---|
| Average viewer engagement time | 8.5 minutes |
| Interaction rate | 65% |
| Production cost increase | 150% |
| User retention rate | 73% |
AI and Generated Content
Artificial intelligence revolutionizes music video creation through:
- Real-time face swapping enabling viewers to insert themselves
- Automated video editing based on music rhythm analysis
- Dynamic background generation responding to audio frequencies
- Personalized content adaptation using viewer data
| AI Implementation Costs | Amount |
|---|---|
| Basic AI integration | $5,000 |
| Advanced neural rendering | $25,000 |
| Custom AI development | $50,000+ |
Cross-Platform Integration
Modern music videos adapt seamlessly across multiple platforms through:
- Vertical formats optimized for mobile viewing
- Platform-specific interactive features
- Synchronized multi-screen experiences
- Augmented reality filters social media integration
These innovations create interconnected viewing experiences increasing engagement across various digital touchpoints while maintaining consistent visual quality standards.
Conclusion
Music videos have transformed from simple promotional tools into a dynamic art form that shapes our cultural landscape. We’ve witnessed their evolution from MTV’s early days to today’s innovative VR experiences and AI-powered productions.
As we look ahead the fusion of technology creativity and storytelling in music videos will continue to push boundaries. The accessibility of professional resources and digital platforms has democratized content creation while maintaining high production standards. This exciting blend of artistry and innovation ensures that music videos will remain a vital force in how we experience and share music for generations to come.
Essential Guide: Understanding Video Footage Types, Equipment, and Best Practices in 2024

In today’s digital age, video footage has become an integral part of our daily lives. We capture moments, tell stories, and share experiences through the lens of our cameras and smartphones. From social media content to professional filmmaking, the power of moving images continues to shape how we communicate and preserve memories.
We’ve witnessed remarkable evolution in video technology over the years. What started as grainy black-and-white films has transformed into crystal-clear 4K resolution and immersive 360-degree experiences. As content creators and consumers, we’re constantly exploring new ways to leverage video footage across different platforms and purposes. Whether it’s for entertainment, documentation, or marketing, video remains one of the most engaging and versatile mediums in our modern world.
What Is Video Footage: A Complete Overview
Video footage consists of recorded visual content captured through cameras or recording devices. It encompasses a sequence of moving images stored in digital or analog formats for playback, editing or distribution.
Types of Video Footage Formats
Video footage formats fall into three primary categories:
- Raw footage: Uncompressed, high-quality video data directly from cameras
- Compressed footage: Processed video with reduced file size for storage efficiency
- Broadcast footage: Standardized formats used by television networks (NTSC, PAL, SECAM)
- Digital Cinema footage: High-end formats for theatrical release (DCI-compliant)
- Online footage: Optimized formats for streaming platforms, including music videos
Common Video File Extensions
The most widely used video file extensions include:
| Extension | Format Type | Primary Use |
|---|---|---|
| .MP4 | MPEG-4 Part 14 | Web streaming & social media |
| .MOV | QuickTime Movie | Professional video editing |
| .AVI | Audio Video Interleave | Windows-based systems |
| .WMV | Windows Media Video | Microsoft platforms |
| .FLV | Flash Video | Web-based playback |
| .MKV | Matroska Video | High-definition content |
| .WEBM | Web Media | HTML5 video streaming |
- .MP4: Universal compatibility across devices & platforms
- .MOV: Superior quality for professional editing workflows
- .MKV: Support for multiple audio tracks & subtitles
- .WEBM: Efficient compression for web delivery
- .AVI: Wide compatibility with editing software
Essential Equipment for Capturing Quality Footage
Professional video footage requires specific tools to achieve optimal results. Here’s the essential equipment breakdown for capturing professional-grade content.
Camera Options and Requirements
Video cameras range from professional cinema cameras to compact DSLRs. A 4K-capable camera with manual controls captures crisp footage at 3840×2160 resolution. Here are the key camera specifications for different production needs:
- Cinema Cameras: RED or ARRI systems offer 6K+ resolution raw recording for music videos
- Professional Camcorders: Sony PXW series provides XLR inputs with 10-bit 4:2:2 color depth
- Mirrorless Cameras: Sony A7 III or Panasonic GH5 deliver 4K recording with interchangeable lenses
- Action Cameras: GoPro HERO10 captures stabilized footage at 5.3K resolution
- Smartphone Cameras: iPhone 14 Pro records 4K ProRes for mobile production
Lighting and Audio Gear
Proper lighting equipment transforms basic footage into polished productions. The essential lighting kit includes:
- LED Panels: 2-3 adjustable brightness panels with color temperature control
- Softboxes: 24×36 inch diffusers for evenly distributed light
- Ring Lights: 18-inch diameter for close-up shots
- C-Stands: 3 heavy-duty stands with sandbags for stability
- Microphones:
- Shotgun mic for directional recording
- Lavalier mics for dialogue
- XLR condenser mic for music video vocals
- Audio Interfaces: Minimum 2-channel with phantom power
- Digital Recorders: 4-track capability with timecode sync
- Headphones: Closed-back monitoring headphones for audio checks
Best Practices for Recording Professional Video
Professional video recording requires precise technical knowledge and artistic vision to create compelling footage. Here’s how to achieve broadcast-quality results through optimal settings and composition techniques.
Camera Settings and Techniques
Recording professional video footage starts with mastering essential camera settings:
- Set shutter speed to double the frame rate (1/50 for 25fps 1/60 for 30fps)
- Select appropriate aperture settings (f/2.8-f/5.6 for interviews f/8-f/11 for landscapes)
- Configure ISO levels between 100-800 for clean noise-free footage
- Record in the highest quality codec available (ProRes 422 RAW or H.264)
- Enable zebra stripes at 70% for skin tones 100% for highlights
- Activate focus peaking to ensure sharp subjects
- Monitor audio levels between -12dB to -6dB for clear sound
Composition Guidelines
Create visually engaging video footage through these composition principles:
- Frame subjects using the rule of thirds grid overlay
- Leave headroom above subjects at 10-15% of frame height
- Maintain consistent eye-line across interview shots
- Position subjects at 45-degree angles for dynamic music video performances
- Create depth using foreground middle ground background layers
- Establish leading lines to direct viewer attention
- Allow proper nose room for subject movement
- Use negative space to emphasize focal points
- Match action across multiple camera angles
- Maintain 180-degree rule for directional consistency
- Create symmetrical frames for artistic sequences
Each of these techniques builds upon the foundational equipment knowledge while incorporating specific requirements for various video formats including music videos entertainment content.
Video Storage and Organization Methods
Professional video footage requires systematic storage solutions to maintain accessibility and protect valuable content. Effective organization methods ensure quick retrieval while safeguarding against data loss.
Digital Asset Management Systems
Digital Asset Management (DAM) systems streamline video footage organization through metadata tagging and advanced search capabilities. These platforms organize content by categories such as project names, shoot dates or file types making it easier to locate specific video segments. Popular DAM solutions include:
- Automated metadata extraction from video files
- Custom taxonomies for footage categorization
- Version control tracking for edited clips
- Access control permissions for team collaboration
- Integration with editing software platforms
- Real-time preview capabilities for quick review
| Backup Level | Storage Type | Retention Period | Use Case |
|---|---|---|---|
| Primary | Local RAID | 30-90 days | Active projects |
| Secondary | Network Storage | 6-12 months | Recent projects |
| Archive | LTO Tapes/Cloud | 5+ years | Completed projects |
- Automated backup scheduling for continuous protection
- Geographic redundancy across multiple storage locations
- Regular integrity checks of archived footage
- Cold storage options for long-term preservation
- Standardized naming conventions for easy retrieval
- Disaster recovery protocols for critical content
Video Footage Editing Essentials
Video editing transforms raw footage into polished content through precise cuts transitions color correction. The editing process requires specialized software tools specific techniques to create engaging visual narratives.
Popular Editing Software Options
Professional video editing software provides comprehensive tools for manipulating video footage:
- Adobe Premiere Pro: Industry-standard software with advanced color grading tools multi-camera editing capabilities
- DaVinci Resolve: Features professional color correction tools free version for beginners
- Final Cut Pro X: Mac-exclusive software offering magnetic timeline automatic content analysis
- Vegas Pro: Windows-based editor with extensive audio editing features customizable interface
- Lightworks: Cross-platform editor supporting various video formats professional effects
Basic Editing Techniques
Essential editing techniques create professional-looking video content:
- Cut Assembly
- Create rough cuts to establish sequence flow
- Remove unnecessary footage dead space
- Sync multiple camera angles for music video production
- Transition Effects
- Apply dissolves between scenes for smooth progression
- Use cross-fades to blend audio tracks
- Insert dynamic wipes for stylistic impact
- Color Correction
- Adjust exposure contrast for consistent lighting
- Balance white levels across all footage
- Apply color grading for specific moods aesthetics
- Audio Enhancement
- Normalize audio levels across clips
- Remove background noise artifacts
- Mix multiple audio tracks for clarity
- Motion Graphics
- Add text overlays lower thirds
- Create custom animated titles
- Incorporate visual effects motion tracking
Each technique requires precise timing attention to detail to maintain professional quality throughout the edited video footage.
Conclusion
Video footage has revolutionized how we capture tell and share stories in our digital age. From choosing the right equipment to mastering editing techniques we’ve explored the essential elements that make video production both an art and a science.
The journey from raw footage to polished content requires careful attention to technical details proper storage solutions and creative vision. We’ve seen how modern tools and techniques have made professional-quality video production more accessible than ever.
As we continue to push the boundaries of visual storytelling video footage remains an invaluable medium for preserving memories creating engaging content and connecting with audiences worldwide.
How to Make Stock Videos That Sell: A Complete Guide for Creators (2024)
The booming demand for video content has created unprecedented opportunities in the stock footage market. As content creators continually search for high-quality visuals to enhance their projects, learning how to create and sell stock videos has become an attractive venture for aspiring videographers.
We’ll explore how to craft compelling stock footage that stands out in today’s competitive marketplace. With over 6 million pre-licensed 4K and HD clips available online, it’s crucial to understand what makes stock footage valuable and how to create content that buyers actually want. Whether you’re shooting cityscapes, nature scenes, or lifestyle content, we’ll show you how to capture footage that tells a story and meets professional standards.
How To Make Stock Videos
Creating high-quality stock videos requires attention to specific technical standards and an understanding of in-demand themes. Stock footage that sells combines professional execution with marketable content that meets current industry demands.
Technical Requirements
- Shoot in 4K resolution for maximum versatility across platforms
- Maintain steady camera movements using Steadicam or stabilization equipment
- Record at high frame rates (60fps minimum) for slow-motion capabilities
- Ensure proper exposure with well-balanced lighting
- Capture clean audio without background noise
- Film in RAW format when possible for enhanced editing flexibility
- Use manual focus to prevent autofocus hunting
- Keep ISO settings low to minimize digital noise
- Urban Environments
- City skylines
- Street scenes
- Public transportation
- Architecture details
- Nature & Landscapes
- Aerial views
- Seasonal changes
- Weather phenomena
- Wildlife interactions
- Business & Lifestyle
- Professional workplace settings
- Remote work scenarios
- Team collaborations
- Daily activities
- Abstract & Texture
- Light patterns
- Liquid movements
- Particle effects
| Theme Category | Commercial Demand | Technical Requirements |
|---|---|---|
| Urban Scenes | High | 4K + Stabilization |
| Nature Shots | Very High | High Frame Rate + RAW |
| Business Content | Steady | Proper Lighting + Audio |
| Abstract Elements | Growing | Creative Effects + Clean ISO |
Essential Equipment and Setup
Creating professional stock videos requires specific equipment to capture high-quality footage that meets industry standards. Here’s a comprehensive overview of the essential gear needed to start producing marketable stock footage.
Camera and Gear
A professional-grade camera forms the foundation of stock video production. The essential camera equipment includes:
- DSLR or mirrorless camera with 4K video capabilities
- Versatile zoom lenses (24-70mm f/2.8 85mm f/1.8)
- Sturdy tripod with fluid head for smooth pans
- Camera cage or rig for stabilization
- Variable ND filters for exposure control
- Memory cards (minimum 128GB V60 speed class)
- External monitor for accurate framing
- Portable external hard drives for backup
- LED panel lights with adjustable color temperature
- Diffusion materials (softboxes diffusion sheets)
- Light stands with sandbags for stability
- Portable reflectors for fill light
- Battery packs for location shooting
- Gels for creative color effects
- Light meters for exposure accuracy
| Equipment Type | Minimum Investment | Professional Level |
|---|---|---|
| Camera Body | $1,500 | $3,500+ |
| Essential Lenses | $800 | $2,000+ |
| Lighting Kit | $500 | $1,500+ |
| Support Gear | $400 | $1,200+ |
Planning Your Stock Video Shoot
Creating successful stock videos starts with thorough pre-production planning. A well-structured approach ensures high-quality footage that meets market demands while maximizing shooting efficiency.
Location Scouting
Location scouting identifies optimal filming spots that align with current stock video trends. Scout locations during different times of day to understand lighting conditions, potential disruptions, and required permits. Consider these key factors:
- Evaluate natural lighting patterns across different hours
- Identify potential background distractions
- Check for ambient noise levels
- Assess accessibility for equipment setup
- Document parking options nearby
- Research permit requirements for commercial filming
- Primary subject framing options
- Camera movement specifications
- Required lens selections
- Lighting setups for each shot
- Duration estimates per sequence
- Alternative angles for each scene
- Technical specifications (frame rate resolution)
- Weather contingency options
| Shot Type | Recommended Duration | Frame Rate |
|---|---|---|
| Static Shots | 10-15 seconds | 24/30 fps |
| Moving Shots | 15-20 seconds | 60 fps |
| Time-lapse | 30-45 seconds | 24 fps |
| Slow Motion | 5-10 seconds | 120+ fps |
Filming Techniques for Stock Videos
Creating professional stock videos requires mastering essential filming techniques that enhance visual appeal and marketability. These techniques form the foundation of high-quality footage that meets industry standards.
Camera Movements and Angles
Professional stock videos incorporate five fundamental camera movements that create dynamic visual interest. Pan shots follow horizontal movement across scenes while maintaining steady motion. Tilt movements capture vertical perspectives from bottom to top or vice versa. Dolly shots move the camera forward or backward on a smooth track. Crane movements combine vertical and horizontal motion for dramatic aerial perspectives. Steadicam shots enable fluid motion while following subjects in motion.
Composition Guidelines
Stock video composition follows established rules that maximize visual impact and versatility. The rule of thirds divides frames into nine equal segments for balanced subject placement. Leading lines direct viewer attention through natural or architectural elements. Symmetrical framing creates visually appealing centered compositions. Negative space provides room for text overlay or graphics. Frame-within-frame techniques use doorways or windows to add depth. These composition elements enhance the commercial value of stock footage by providing flexible options for end users.
| Camera Movement | Best Use Case | Typical Duration |
|---|---|---|
| Pan | Landscapes | 10-15 seconds |
| Tilt | Architecture | 8-12 seconds |
| Dolly | Product shots | 5-10 seconds |
| Crane | Establishing shots | 15-20 seconds |
| Steadicam | Action sequences | 10-30 seconds |
Post-Production Best Practices
Post-production enhances the visual appeal of stock videos through careful editing, color grading and formatting optimization. These techniques transform raw footage into polished, professional content that meets marketplace standards.
Color Grading Tips
- Apply subtle color adjustments to maintain natural-looking footage while enhancing visual appeal
- Use color wheels for precise control over highlights, midtones and shadows
- Create distinct moods through thoughtful color manipulation based on established color theory
- Maintain consistent color temperature throughout related clips
- Export a neutral version alongside stylized grades to maximize versatility
- Avoid heavy-handed effects that limit footage usability
- Test grades across multiple displays to ensure consistent appearance
- Export in 4K resolution (3840 x 2160) when possible for maximum flexibility
- Maintain 1080p minimum resolution for slow-motion sequences
- Include varied formats:
- Real-time footage (24-30fps)
- Slow motion (60-120fps)
- Time-lapse sequences
- Apply noise reduction selectively to low-light footage
- Export in standard codecs like H.264 or ProRes
- Set appropriate bitrates:
- 4K: 35-50 Mbps
- 1080p: 15-25 Mbps
| Resolution | Frame Rate | Bitrate |
|---|---|---|
| 4K | 24-30fps | 35-50 Mbps |
| 4K | 60fps | 50-65 Mbps |
| 1080p | 24-30fps | 15-25 Mbps |
| 1080p | 60fps | 25-35 Mbps |
Marketing and Selling Your Stock Videos
Video content drives 82% of consumer internet traffic, creating lucrative opportunities for stock video creators. Successfully marketing stock videos requires strategic platform selection and effective pricing models.
Choosing the Right Platforms
Stock footage marketplaces serve distinct audiences with varying commission structures and technical requirements. Here are the key considerations for selecting platforms:
- Major Marketplaces: Upload to established platforms with high traffic volumes like Shutterstock or Adobe Stock
- Specialty Sites: Target niche platforms focused on specific categories like nature or business footage
- Exclusive vs. Non-exclusive: Choose between higher per-sale rates with exclusive rights or broader distribution options
- Technical Requirements: Match platform specifications for resolution quality frame rates file formats
- Review Process: Consider approval timelines submission guidelines content standards
Pricing Strategies
Stock video pricing requires balancing market demand with competitive positioning. Here’s a structured approach to pricing:
Resolution-Based Pricing
| Resolution | Price Range (USD) |
|---|---|
| HD 1080p | 50-150 |
| 4K | 150-300 |
| 8K | 300-500 |
- Analyze competitor rates for similar content types
- Set premium prices for unique or high-demand footage
- Offer package deals for footage series or collections
- Adjust prices based on licensing terms duration
- Monitor sales data to optimize pricing structure
- Standard licensing for basic usage rights
- Extended licensing for broader commercial use
- Custom licensing for specific client needs
- Territory-based pricing for regional markets
Conclusion
Creating high-quality stock videos requires dedication technical expertise and the right equipment. But with the growing demand for video content the opportunities in this market are limitless. We’ve shared our proven strategies for producing sellable footage from pre-production planning to post-production optimization.
Whether you’re a beginner or an experienced videographer these guidelines will help you create compelling stock footage that sells. Remember that success in the stock video market comes from consistently delivering professional-quality content that meets market demands.
Start implementing these techniques today and you’ll be well on your way to building a profitable stock video portfolio. The market is waiting for your unique perspective and creative vision.
3 Reasons You Should Get Video Backgrounds from Free Video Footage

Video backgrounds are an important part of web design today. They help capture the attention of visitors and increase conversion rates higher than still images. They also help improve sales as they aid in encouraging visitors to sign up for a product or service. But, you have to choose the right ones and use them the proper way in order to succeed.
With several video background sources in the market, where should you get yours? If you under a tight budget, you would love to know that Free Video Footage offers them for free. Yes, that’s right! FVF offer video backgrounds, motion graphics, transitions and the like to the entire creative community at absolutely no cost. No tricks! Visit the website, www.free-video-footage.com, to find out.
If you are not certain if Free Video Footage suits your creative needs, here are three main reasons to convince you:
- Royalty Free License. All of their exclusive video backgrounds, overlays, lower thirds, motion elements, transitions, sounds and fonts come with a royalty free license. This means you can use them in your personal and commercial products. As long as you abide with the stock site terms and conditions, you have absolutely nothing to worry about.
- Everything is for Free. At Free Video Footage, you can download everything for free. There are no hidden fees and commitments to surprise you down the road. Amos Struck and his team built and developed the company as a way to give back to the creative community, which supported them all these years.
- New Videos Regularly. Fresh content are added constantly, so you will have plenty of choices to enhance your creative projects. Every week, hundreds of new video clips and footage videos are added in the library. All are available for download – completely free of charge.
FVF videos come in various resolutions. Whether you are looking for SD or HD content, you will find them here. All are suitable for professional use, so you don’t have to worry about copyright issues down the road. You can use them virtually in any you want. The sky is the limit!
Is it safe to use free videos?
All videos from Free Video Footage have been reviewed and cleared for legal validity. They all come with a standard royalty free license that allows you to use them for personal and commercial purposes. All videos are safe to use, but be sure to read the terms and conditions to avoid any legal issues in the future. All clips are professionally made and are acquired from a known source. They are all legally checked, too.
No user-submitted content.
No Creative Commons.
Is this for real? Are you really getting the videos for free? Well, pinch yourself. The video backgrounds and video footage are really for free. No tricks! You can download all the clips and footage you want without paying a single penny. Free Video Footage does not restrict your creativity. Express yourself and enhance your projects without having to worry about budget.